
Dashboard Builder
See the parameters, referrers and pages behind any traffic, turn unfiltered traffic into filters, and manage channels and filters in bulk
The Dashboard Builder is where you look at the traffic behind the dashboard and shape the dashboard in bulk. It has two tabs, Manage Traffic and Manage Channels. Most of its use comes while a project is being set up, when the unfiltered traffic is sorted into filters; after that it is the place to go when a filter shows something unexpected or many rows need moving at once. Open it from the top navigation, or from any row's Debug in Dashboard Builder, which lands on that row's traffic.
Manage Traffic: organise unsegmented traffic
Manage Traffic opens on Unsegmented Traffic, the visits no filter claims yet, for the date range you choose. They are broken down three ways, by Parameters in the landing URL, by Referring Domains and by Paths, each row with its number of visits. Narrow the table to visits tagged with one parameter to see what else those visits carry.
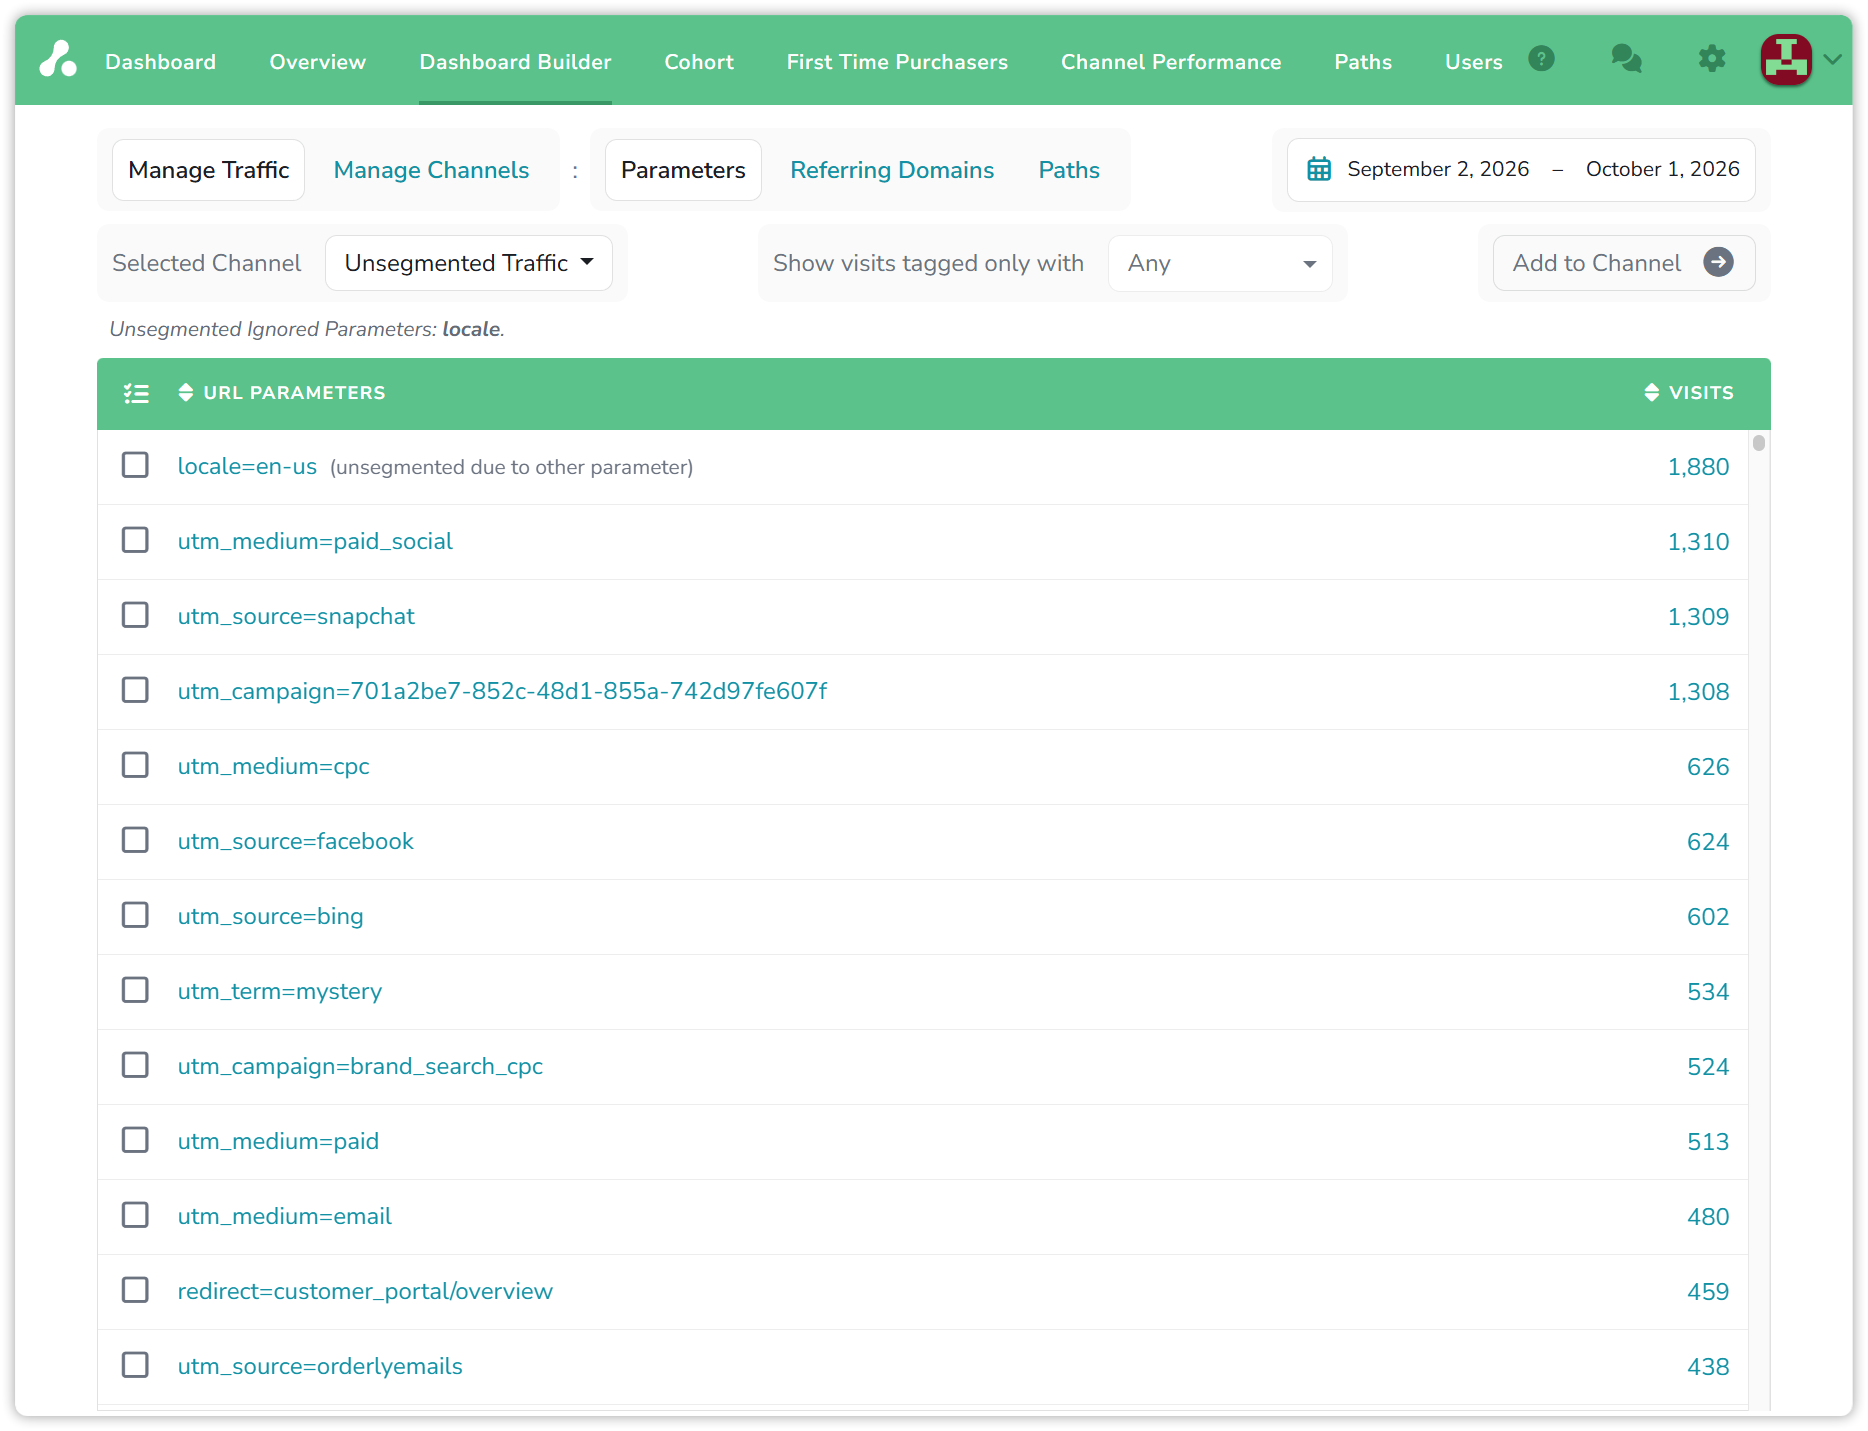
Not every row needs a filter. Make filters for the traffic you recognise and want to follow, a campaign you run, a partner you pay, a newsletter you send; leave the rest where it is. Unless Unsegmented Traffic is being credited with a noticeable share of conversions or revenue, sorting its long tail is not worth the effort.
To make a filter, select the parameter values or referring domains you want to track, combine them if one filter should match more than one, and Add to Channel creates the filters in a channel you pick or create on the spot. The new filters claim matching visits, past ones included, once the data has been recalculated.
Some parameters say nothing about where a visit came from, a page number, a variant, a locale, a session id. List them as ignored URL parameters in Project Settings and they stop counting as tags: a visit that carries only ignored parameters is treated as direct or unsegmented, as you choose there. The builder shows the ignored parameters above the table and marks a row as unsegmented due to another parameter when that is why its visits are still here.
The visit counts shown here are approximate until the filter exists, and any new or changed filter takes time to recalculate before the dashboard reflects it; the page says so at the top.
Manage Traffic: inspect any channel
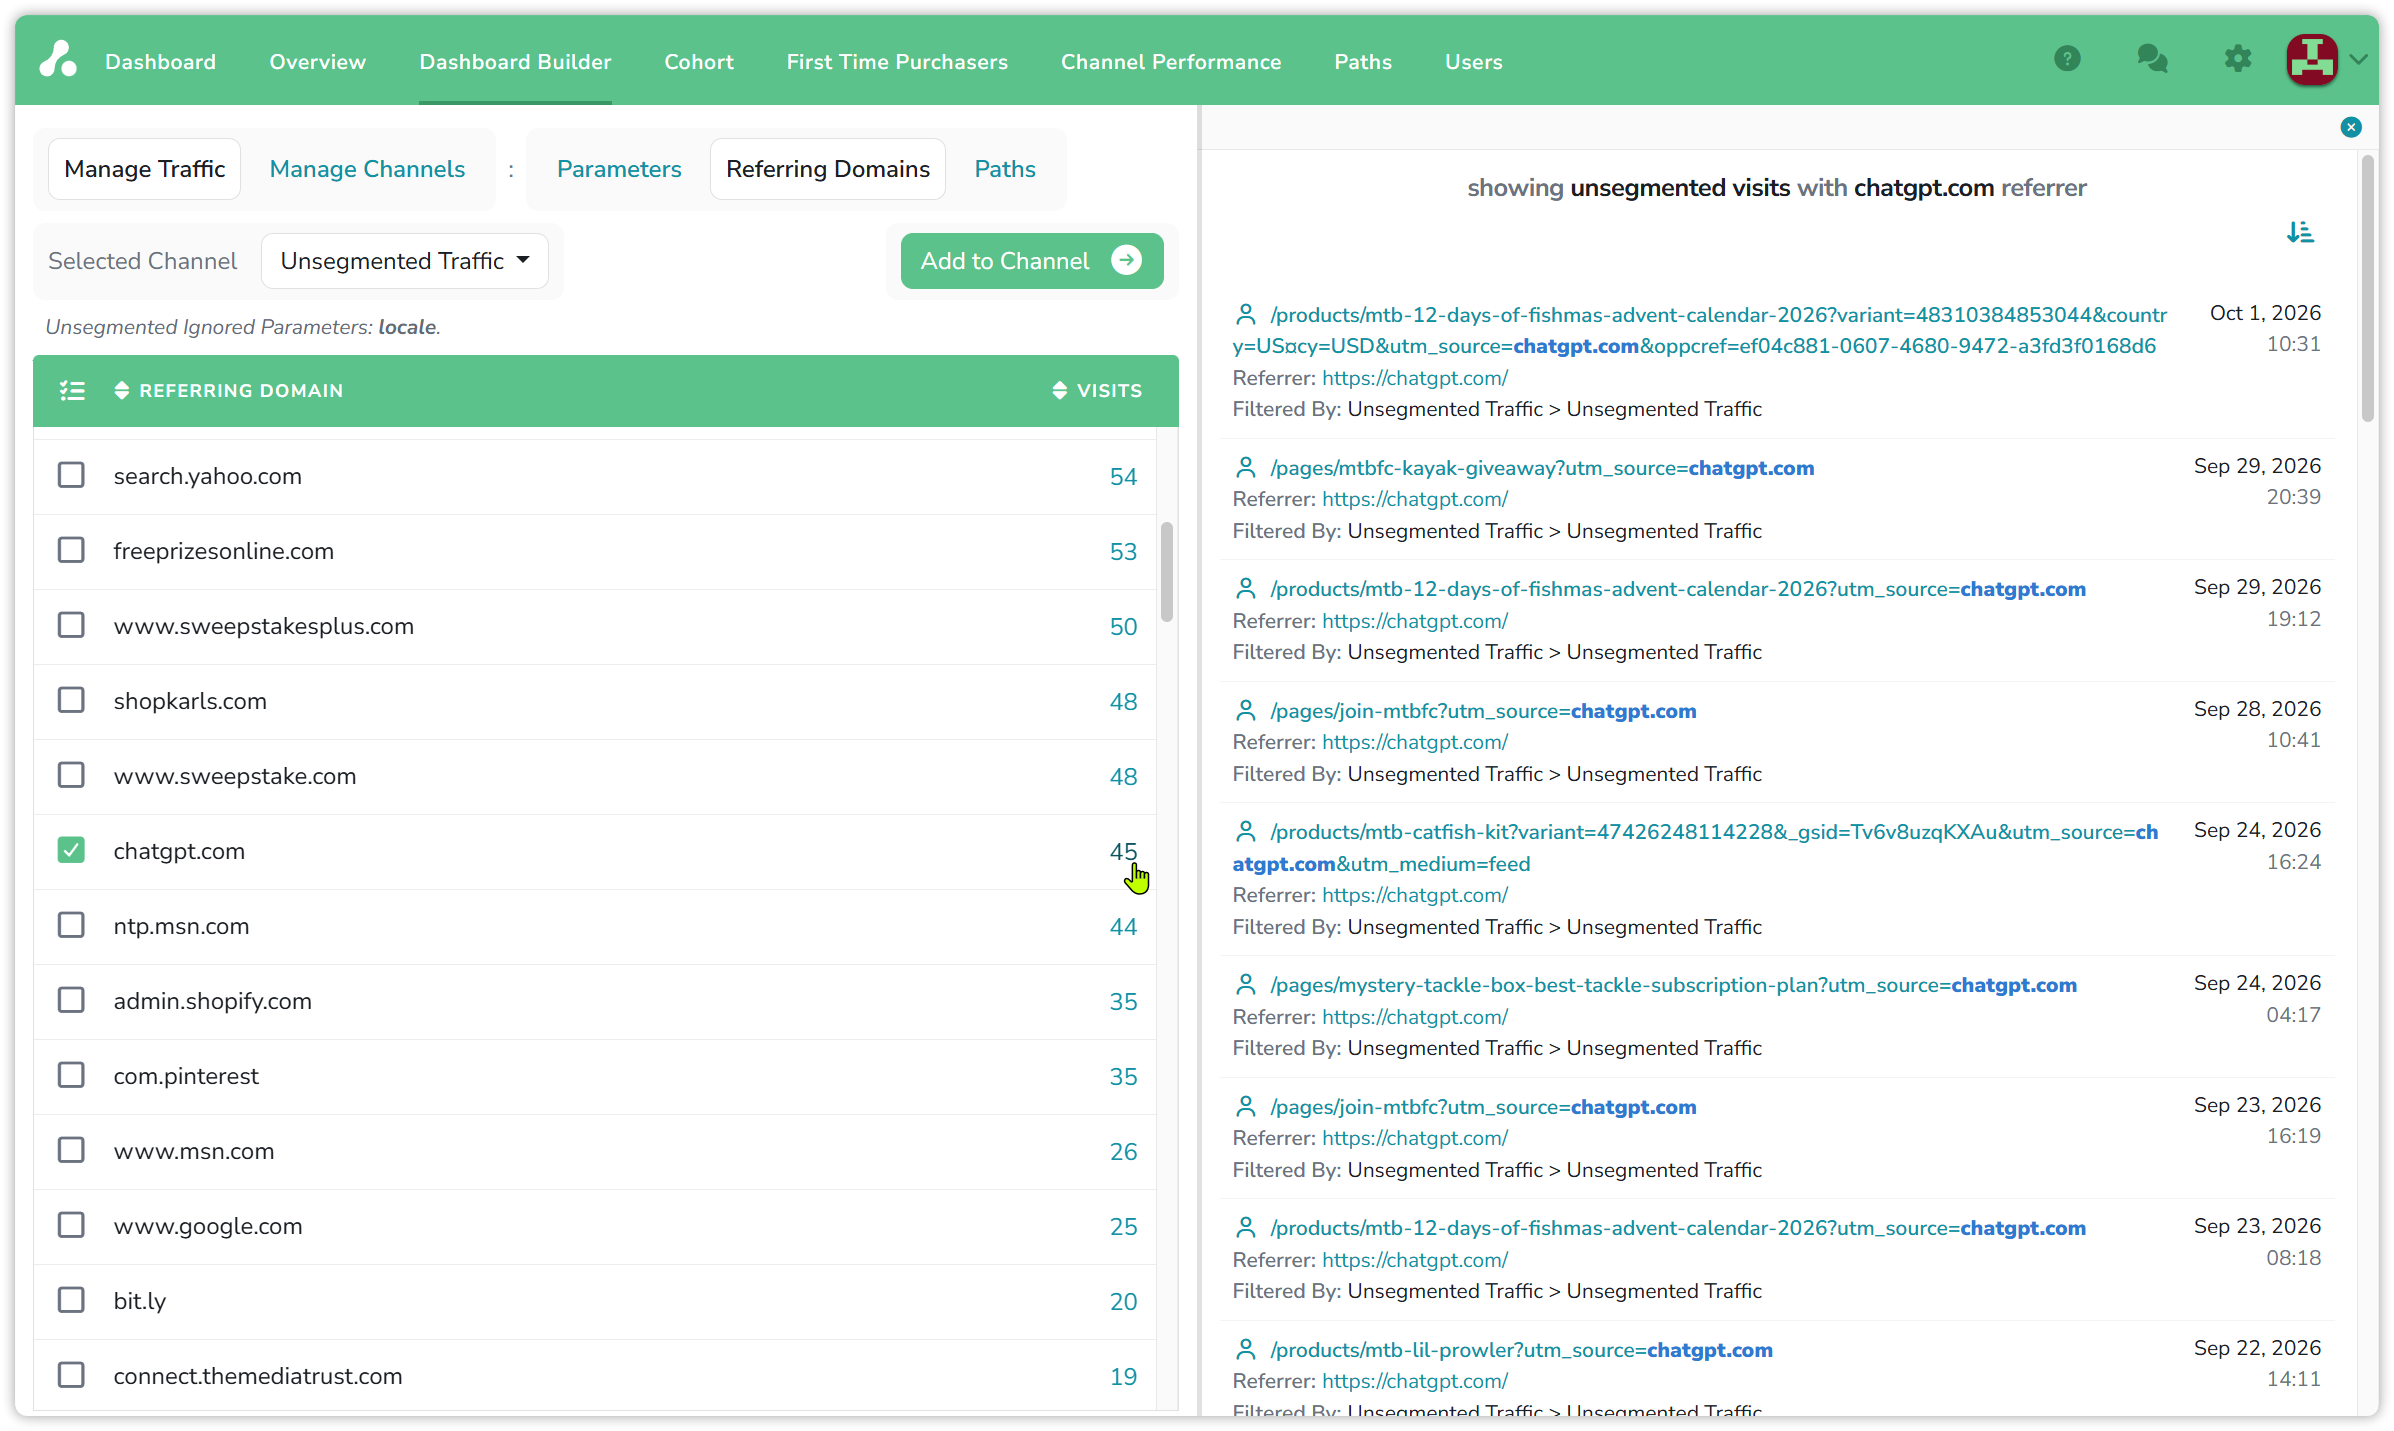
The same view works on any source. Switch the selected channel from Unsegmented Traffic to All Traffic or to one channel or filter and you see exactly which parameters, referrers and landing pages its visits carry, which answers most questions of the form "why did this land here" or "what is this channel really made of". A row opens a sidebar with the visits behind it, each with its landing URL and referrer, and from there each visitor's history. Every source other than Unsegmented Traffic is there to be inspected, not filtered.
Manage Channels: shape the dashboard in bulk
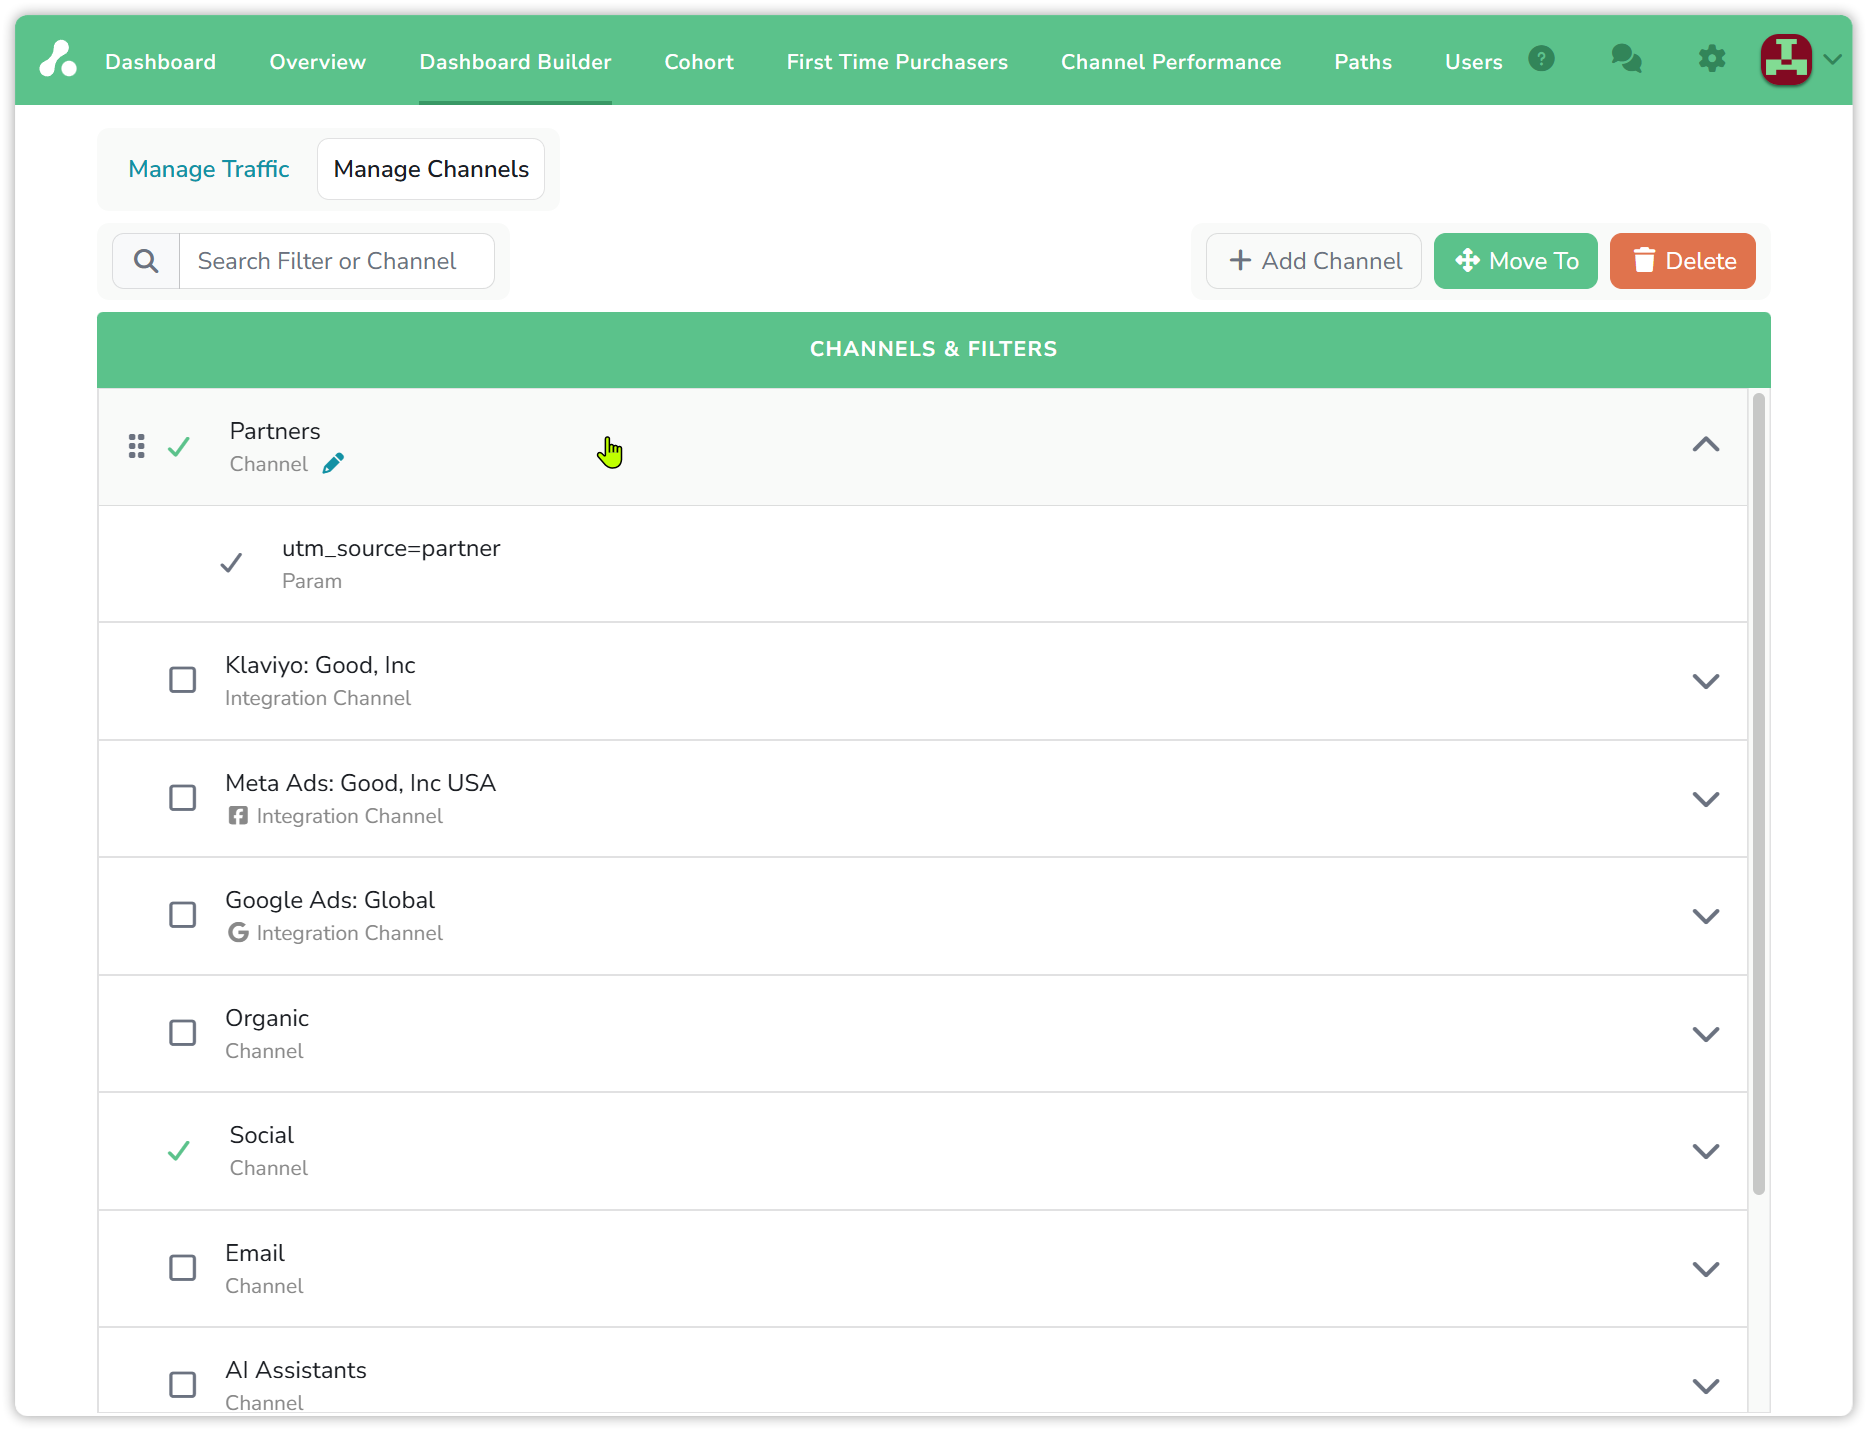
The second tab is the full tree of your channels and filters, with a search. Select as many as you need, then delete them, nested channels and filters included, move them into another channel, or create a new channel to move them into. These are the same moves as Arrange on the dashboard, for many rows at once.
What filters and channels are, and how the order of the dashboard decides which filter wins a visit, is on Channels, filters & groups; the rows every project starts with are on Default channels.
If you have any questions please reach out to [email protected].
Updated 21 days ago